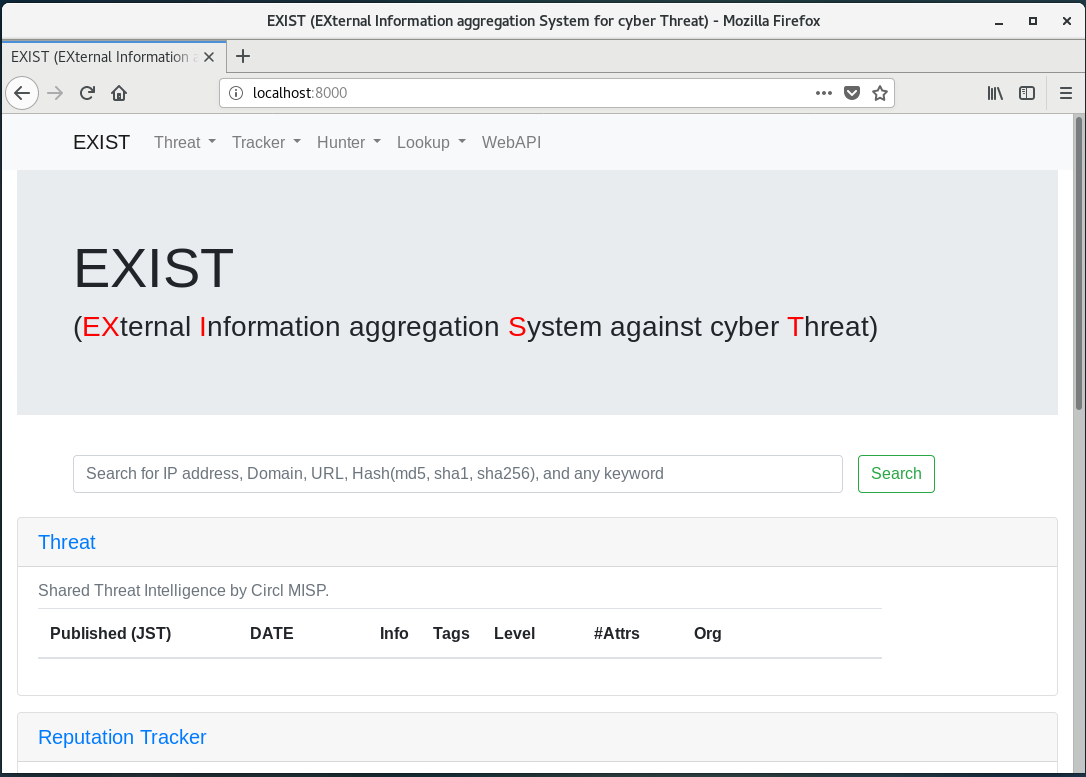
EXIST は VirusTotal や Shodan、Twitte などの情報を API を通じて取得し、脅威情報(IPアドレスやハッシュ値)の関連情報を横断的に検索することができる「サイバー脅威情報集約システム」です。
MISP と連携可能なので、ここでは EXIST+MISP 環境を構築していきます。
なお、CentOS 7 に対して EXIST+MISP 環境を自動で導入できるスクリプトを github で公開しています。 手っ取り早く環境構築したい場合は以下からご利用ください。
EXIST+MISP 環境を自動で導入できるスクリプト
- EXIST+MISP 環境を自動で導入できるスクリプト
- サイバー脅威情報集約システム EXIST とは
- CentOS 7 のインストール
- MISP のインストール
- EXIST のインストール
- EXIST の起動設定
- EXIST や MISP へのアクセス
- EXIST の活用について
- 参考文献
- 付録:トラブルシューティング
- yum コマンドが自動アップデートとバッティングしてしまう
- yum のインストールが遅い
- scripts/threat/insert2db.py 実行時のエラー
- 取得ツイートの日本語が文字化けする
- Running setup.py install for uWSGI ... error
- DB のセキュリティ設定(mysql_secure_installation) で「Switch to unix_socket authentication」と聞かれる
- EXIST のページスクリーンショットがうまく取得できない
- ImportError:configparserというモジュールはありません
- MISP のタイムゾーンがヨーロッパになっている(時刻表示がずれる)
- EXIST にアクセスすると DisallowedHost と表示される
- 各種検索時に VirusTotal の情報が取得できていない
- message:No section: というエラーが出る
- 付録
- 更新履歴
サイバー脅威情報集約システム EXIST とは
EXIST(EXternal Information aggregation System against cyber Threat)は NICT の NICTER 解析チームが開発しているサイバー脅威情報集約システムです。オープンソースソフトウェアとして公開されています。
EXISTは,サイバー脅威情報を集約し,様々な情報源を横断的に検索することができるWebアプリケーションです. 様々な情報源からサイバー脅威情報をフィードやAPI経由で取得し,EXIST上のデータベースに集約します. 利用者はWebUIもしくはWebAPIで,サイバー脅威情報を特定のキーワードで横断的に検索することが出来ます.
さっそく構築手順に進みます。
CentOS 7 のインストール
まず CentOS 7 を準備します。ここでは VMware Workstation 15.5 Pro 上に CentOS 7 を導入します。 以下では GUI ありのサーバで導入する場合も念頭に記載していますが、最小構成のサーバの場合でも概ね同様の手順で導入できます。
GUI ありの場合は画面ロックを無効化しておきます
インストール中に画面がロックされると煩わしいので、画面のロックを無効化しておきます。
[アプリケーション]>[システムツール]>[設定]>[プライバシー]>[画面ロック]:オフ
[アプリケーション]>[システムツール]>[設定]>[電源管理]>[ブランクスクリーン]:しない
MISP のインストール
ここから先の作業はすべて root 前提で進めます。
su -
以下のスクリプトを利用してインストールします。*1 なおスクリプトの処理の都合上、EXIST より先に実行する必要があります。
- vodkappa/misp-install-centos-7: script(s) info for automating installing MISP to CentOS 7
https://github.com/vodkappa/misp-install-centos-7
MISP インストールスクリプトの取得
wget https://raw.githubusercontent.com/vodkappa/misp-install-centos-7/master/misp.install.sh
wget https://raw.githubusercontent.com/vodkappa/misp-install-centos-7/master/misp.variables.sh
MISP インストールスクリプトの修正
少し古いスクリプトのようで、そのままではうまく動かないので一部記載を修正します。同時に多少カスタマイズします。
以下のコマンドを入力します。
## 特にインストールには不要なのでホスト名の変更処理をコメントアウト
sed -i -e "s/hostnamectl/#hostnamectl/" misp.install.sh

## php のバージョンが古いままなので修正(rh-php56 -> rh-php72)
sed -i -e "s/rh-php56/rh-php72/g" misp.variables.sh
sed -i -e "s/rh-php56/rh-php72/g" misp.install.sh

## 不要な処理なのでコメントアウト
sed -i -e "s/yum install python-importlib/##yum install python-importlib/g" misp.install.sh

## DB の文字コードを UTF-8 に変更します
## これをしておかないと EXIST で日本語が文字化けします。
CHANGE_DB_CHARSET_TO_UTF8='sed -i -e "$(grep \\\\[mysqld\\\\] -n /etc/my.cnf.d/server.cnf | cut -d : -f 1)a character-set-server=utf8" /etc/my.cnf.d/server.cnf'
sed -i -e "$(grep 'systemctl enable mariadb.service' -n misp.install.sh | cut -d : -f 1)i $CHANGE_DB_CHARSET_TO_UTF8" misp.install.sh
作業の簡易化のためにDB設定周りの問い合わせ応答を自動化しておきます。
## DB のセキュリティ設定(mysql_secure_installation)の問い合わせ部分を自動化
sed -i -e "s/mysql_secure_installation/yum install expect -y\nexpect -c \"\nset timeout 5\nspawn mysql_secure_installation\nexpect \\\\\"Enter current password for root\\\\\"\nsend \\\\\"\\\n\\\\\"\nexpect \\\\\"Set root password\\\\\"\nsend \\\\\"y\\\n\\\\\"\nexpect \\\\\"New password\\\\\"\nsend \\\\\"\${DBPASSWORD_ADMIN}\\\n\\\\\"\nexpect \\\\\"Re-enter new password\\\\\"\nsend \\\\\"\${DBPASSWORD_ADMIN}\\\n\\\\\"\nexpect \\\\\"Remove anonymous users\\\\\"\nsend \\\\\"y\\\n\\\\\"\nexpect \\\\\"Disallow root login remotely\\\\\"\nsend \\\\\"y\\\n\\\\\"\nexpect \\\\\"Remove test database and access to it\\\\\"\nsend \\\\\"y\\\n\\\\\"\nexpect \\\\\"Reload privilege tables now\\\\\"\nsend \\\\\"y\\\n\\\\\"\nexpect \\'$\\\\\"\nexit 0\n\"/g" misp.install.sh
タイムゾーン設定を日本に合わせて修正します。
sed -i -e "s/Europe\/London/Asia\/Tokyo/g" misp.install.sh
MISP インストール用の環境設定
MISP のインストールに必要な環境変数一式を設定します。
. misp.variables.sh
## 実行結果(例)
## . misp.variables.sh
Admin (root) DB Password: 807d0fbcae7c4b20518d4d85664f6820aafdf936104122c5073e7744c46c4b87
User  (misp) DB Password: 2998b3232d29e8dc5a78d97a32ce83f556f3ed31b057077503df05641dd79158
実行した結果として DB Admin のパスワードが表示されます。 上の値は例示であり、実際の値はランダムに生成されます。 後で必要になるので必ずメモしておきます。
MISP インストールスクリプトの実行
MISP のインストールスクリプトを実行します。 スクリプトには「yum update -y」が含まれているので各種パッケージも最新化されます。 この処理は、通信環境などにもよりますが、概ね20分程度かかります。
bash misp.install.sh
以下のような表示になればインストールは完了です。
2019-10-20 16:23:52 Notice: Array to string conversion in [/var/www/MISP/app/Model/Log.php, line 205]
Setting "Session.cookie_timeout" changed to 3600

[root@localhost ~]#
最後にログのローテートに失敗するのを防ぐための設定をしておきます。
sed -i -e "s/}/ su apache apache\n}/g" /etc/logrotate.d/misp
これで MISP の導入は完了です。
EXIST のインストール
MISP と同様に作業はすべて root 前提ですすめます。
su -
EXIST に必要な Python 環境の準備
まず EXIST を git clone しておきます。
cd /opt
git clone https://github.com/nict-csl/exist.git
次に EXIST の動作に必要な Python3.x 環境を導入します。
yum install -y https://centos7.iuscommunity.org/ius-release.rpm
yum install python3 python3-libs python3-devel python3-pip -y
また Python の仮想環境を作っておきます。 仮想環境にしておくと、後々のパッケージ名に関連するエラーの発生を防ぐ事ができます。
cd /opt/exist
python3 -m venv venv-exist
source venv-exist/bin/activate
プロンプトが以下のような表示になっていれば無事に仮想環境が有効になっています。 以降は仮想環境上での作業を前提として進めます。
(venv-exist) [root@localhost exist]#
なお、この仮想環境から抜けるには deactivate と入力します。
EXIST に必要な各種パッケージをインストール
Python の仮想環境で以下のコマンドを実行します。
cd /opt/exist
pip install -r requirements.txt
EXIST に必要なデータベースの準備
EXIST に必要なデータベースとユーザを作成します。 DB へのログインパスワードは MISP 導入時に設定したものを使います(Admin (root) DB Password としてメモしてあるはずの16進数)。
mysql -u root -p 807d0fbcae7c4b20518d4d85664f6820aafdf936104122c5073e7744c46c4b87
以下のコマンドではユーザ名「exist」、パスワード「password」として設定しています。 あくまで例示なので、必要に応じて適切なものに置き換えて実行してください。
MariaDB [(none)]> create database intelligence_db;
MariaDB [(none)]> create user 'exist'@'localhost' identified by 'password';
MariaDB [(none)]> grant ALL on intelligence_db.* to exist;
MariaDB [(none)]> quit
次に EXIST の DB 周りの設定ファイルを修正します。
まずテンプレートから設定ファイルを作成します。
cp intelligence/settings.py.template intelligence/settings.py
修正や追記する項目は以下の通りです。
- ALLOWED_HOSTS:localhost と EXIST が動いているマシンの IP アドレスを追加します
- USER:先程 DB に作ったユーザ名に修正します
- PASSWORD:先程 DB に作ったユーザのパスワードに修正します
- HOST:localhost と入力します
例えば以下のように入力します。
vim intelligence/settings.py
ALLOWED_HOSTS = [
     'localhost',   # add
     'EXIST_Server_IP',   # add
##    '192.168.56.101',
]

(snip)

DATABASES = {
    'default': {
        'ENGINE': 'django.db.backends.mysql',
        'NAME': 'intelligence_db',
        'USER': 'exist',   # modify
        'PASSWORD': 'password',   # modify
        'HOST': 'localhost', # modify
        'PORT': '',
        'OPTIONS': {
            'charset': 'utf8mb4',
            'init_command': 'SET character_set_connection=utf8mb4;'
                            'SET collation_connection=utf8mb4_unicode_ci;'
                            "SET NAMES 'utf8mb4';"
                            "SET CHARACTER SET utf8mb4;"
        },
    }
}
次に Django マイグレーションをかけます。
python3 manage.py makemigrations exploit reputation threat threat_hunter twitter twitter_hunter news news_hunter vuln
python3 manage.py migrate
結果がすべて緑の OK になっていれば問題ありません。
EXIST に必要な Celery の準備
まず Celery に必要な Redis について確認しておきます。 以下のコマンドを入力してグリーンランプがついていれば OK です。
systemctl status redis
もしインストールされていなければ以下の通り入力します。
yum install redis
systemctl start redis
systemctl enable redis
次に sysconfig 配下に Celery の設定ファイルを新規に作成します。
vim /etc/sysconfig/celery
## Name of nodes to start
## here we have a single node
CELERYD_NODES="localhost"
## or we could have three nodes:
##CELERYD_NODES="w1 w2 w3"

## Absolute or relative path to the 'celery' command:
CELERY_BIN="/opt/exist/venv-exist/bin/celery"

## App instance to use
## comment out this line if you don't use an app
CELERY_APP="intelligence"
## or fully qualified:
##CELERY_APP="proj.tasks:app"

## How to call manage.py
CELERYD_MULTI="multi"

## Extra command-line arguments to the worker
CELERYD_OPTS="--time-limit=300 --concurrency=8"

## - %n will be replaced with the first part of the nodename.
## - %I will be replaced with the current child process index
## and is important when using the prefork pool to avoid race conditions.
CELERYD_PID_FILE="/var/run/celery/%n.pid"
CELERYD_LOG_FILE="/var/log/celery/%n%I.log"
CELERYD_LOG_LEVEL="INFO"
次に Celery をサービスとして登録します。 修正箇所は以下の通りです。
- User:root
- Group:root
- WorkingDirectory:/opt/exist (EXIST へのパス)
vim /etc/systemd/system/celery.service
[Unit]
Description=Celery Service
After=network.target

[Service]
Type=forking
User=root
Group=root
EnvironmentFile=/etc/sysconfig/celery
WorkingDirectory=/opt/exist
ExecStart=/bin/sh -c '${CELERY_BIN} multi start ${CELERYD_NODES} \
-A ${CELERY_APP} --pidfile=${CELERYD_PID_FILE} \
--logfile=${CELERYD_LOG_FILE} --loglevel=${CELERYD_LOG_LEVEL} ${CELERYD_OPTS}'
ExecStop=/bin/sh -c '${CELERY_BIN} multi stopwait ${CELERYD_NODES} \
--pidfile=${CELERYD_PID_FILE}'
ExecReload=/bin/sh -c '${CELERY_BIN} multi restart ${CELERYD_NODES} \
-A ${CELERY_APP} --pidfile=${CELERYD_PID_FILE} \
--logfile=${CELERYD_LOG_FILE} --loglevel=${CELERYD_LOG_LEVEL} ${CELERYD_OPTS}'

[Install]
WantedBy=multi-user.target
Celery のログファイル用にディレクトリを作成します。
mkdir /var/log/celery; chown root:root /var/log/celery
mkdir /var/run/celery; chown root:root /var/run/celery
また設定ファイルを新規に作成します。
vim /etc/tmpfiles.d/exist.conf
##Type  Path               Mode  UID        GID         Age  Argument
d      /var/run/celery    0755  root  root  -
最後に Celery サービスを起動しておきます。
systemctl start celery.service
systemctl enable celery.service
Firewall を設定
EXIST で 8000 番ポートを利用するので開けておきます。
firewall-cmd --zone=public --add-port=8000/tcp --permanent
firewall-cmd --reload
ページスクリーンショット取得用の設定
EXIST で URL を検索した際にページのスクリーンショットがうまく表示されるように必要なパッケージの導入と設定を行います。
yum install wkhtmltopdf xorg-x11-server-Xvfb -y
cp scripts/url/url.conf.template scripts/url/url.conf
sed -i -e "s/path\/to\/your\/exist/opt\/exist/g" scripts/url/url.conf
sed -i -e "s/YOUR_DB_USER/exist/g" -e "s/YOUR_DB_PASSWORD/${DBPASSWORD_EXIST}/g" -e "s/YOUR_DB/intelligence_db/g" scripts/url/url.conf

## Japanese Font
yum install ipa-gothic-fonts ipa-pgothic-fonts
fc-cache -f
(オプション)ツイート表示画面にツイートへの直接リンクを追加
EXIST で収集したツイートについて、日時表記部分がツイートへのリンクになるように改修しておきます。これがあったほうが便利です。
cd /opt/exist
sed -i -e "s/{{ tw.datetime }}/\<a href=\"https:\/\/twitter.com\/{{ tw.screen_name }}\/status\/{{ tw.id }}\"\>{{ tw.datetime }}\<\/a\>/g" apps/twitter/templates/twitter/index.html
sed -i -e "s/{{ tw.datetime }}/\<a href=\"https:\/\/twitter.com\/{{ tw.screen_name }}\/status\/{{ tw.id }}\"\>{{ tw.datetime }}\<\/a\>/g" apps/dashboard/templates/dashboard/index.html
sed -i -e "s/{{ tw.datetime }}/\<a href=\"https:\/\/twitter.com\/{{ tw.screen_name }}\/status\/{{ tw.id }}\"\>{{ tw.datetime }}\<\/a\>/g" apps/dashboard/templates/dashboard/crosslist.html
sed -i -e "s/{{ tw.datetime }}/\<a href=\"https:\/\/twitter.com\/{{ tw.screen_name }}\/status\/{{ tw.id }}\"\>{{ tw.datetime }}\<\/a\>/g" apps/twitter_hunter/templates/twitter_hunter/tweets.html
EXIST の起動設定
EXIST サービスの作成
EXIST をサービスとして登録します。 Celery サービスの起動後でないと正常に動作しないため、起動時の条件に記載しています。
vim /etc/systemd/system/exist.service
[Unit]
Description = EXIST
After = celery.service

[Service]
WorkingDirectory=/opt/exist
ExecStart=/opt/exist/venv-exist/bin/python3 manage.py runserver 0.0.0.0:8000
Restart=always
Type=simple
KillMode=control-group
Restart=on-failure

[Install]
WantedBy=multi-user.target
EXIST サービスを起動
systemctl start exist.service
systemctl enable exist.service
これで EXIST の導入は完了です。
EXIST や MISP へのアクセス
EXIST へのログイン
ブラウザから以下にアクセスすると EXIST の画面が表示されます。
http://localhost:8000/

MISP へのログイン
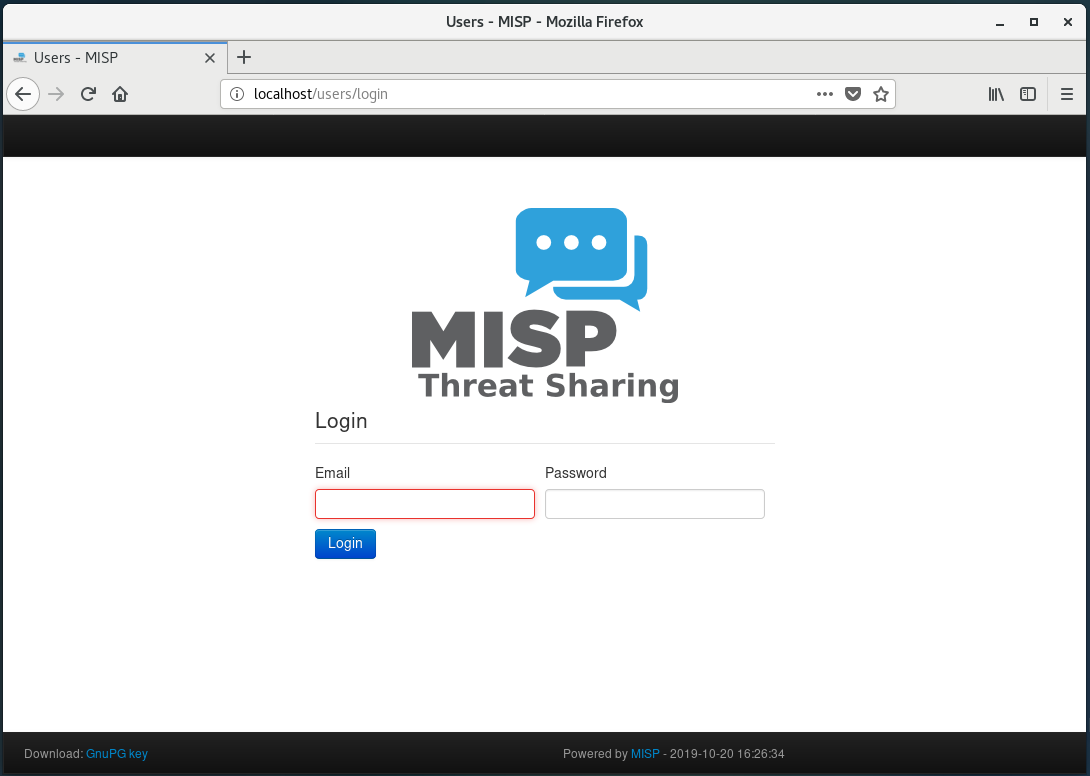
ブラウザから以下にアクセスすると MISP ログイン画面が表示されます。
http://localhost/users/login/
もしくは
http://{Your_VM_IP_address}/user/login/

MSIP のデフォルトユーザ名とパスワードは以下の通りです。
Username: admin@admin.test
Password: admin
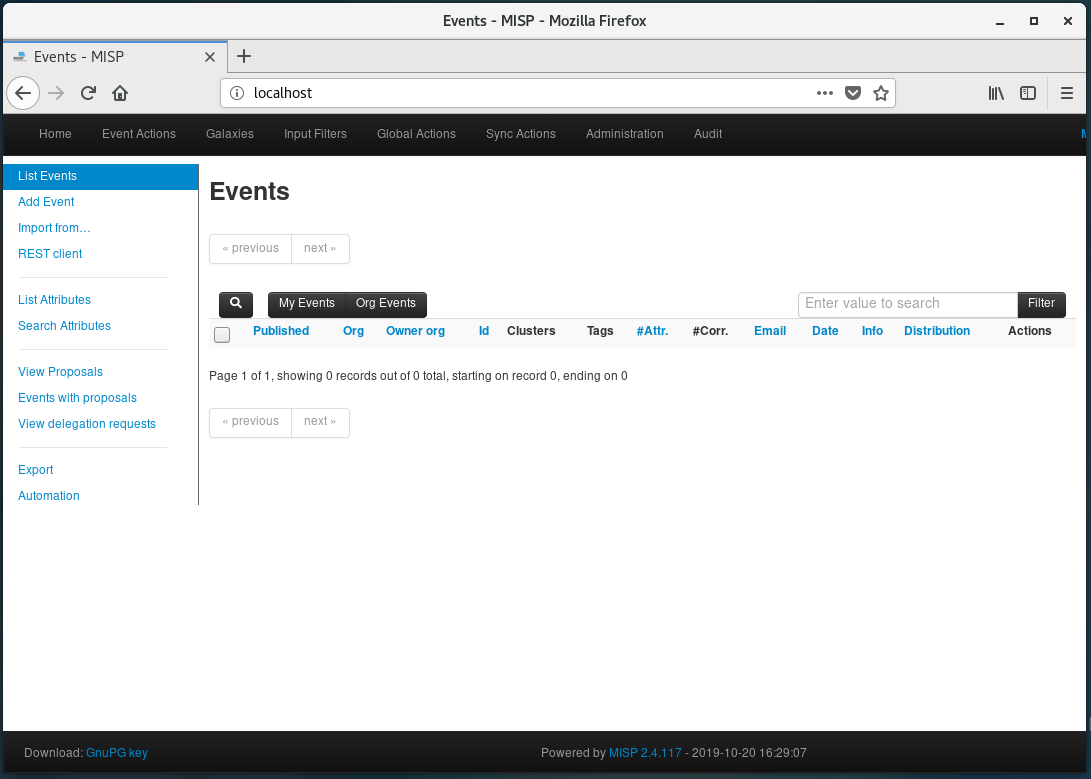
ログイン直後にパスワードの変更が求められます。 それが完了すると Admin ユーザのプロフィールページに遷移します。 左上にある「Home」をクリックすると MISP のダッシュボードが表示できます。

EXIST の活用について
EXIST は各種 API などを設定することで情報収集プラットフォームとして機能します。 Twitter については Twitter API の挙動を理解していないとうまく情報収集ができないので注意が必要です。
これら設定周りについては別途、記事にしますが、現時点で調べた内容をまとめた記事を以下に投稿しています。 ご参考になれば幸いです。
サイバー脅威情報集約システム EXIST を活用する ~Twitter Hunter 周りの設定など~
なお、API周りの設定については以下の記事がとても参考になりました。
- サイバー脅威情報集約システム EXIST を構築してみた #exist | DevelopersIO
https://dev.classmethod.jp/etc/nict-exist/
以上
参考文献
EXIST 関連
公式
サイバー脅威情報集約システム EXIST
https://blog.nicter.jp/2019/03/exist/nict-csl/exist: EXIST is a web application for aggregating and analyzing cyber threat intelligence.
https://github.com/nict-csl/exist
構築周り
サイバー脅威情報集約システム EXIST を構築してみた #exist | DevelopersIO
https://dev.classmethod.jp/etc/nict-exist/NICTのEXISTをインストールしてみた - Qiita
https://qiita.com/ymasaoka/items/d9f679e8b8308b3e72f4NICTの公開したサイバー脅威情報を自動集約できるEXISTをつくってみた(インストール編) - Qiita
https://qiita.com/onionknight/items/cbe4adb8be375a6fda08EXIST @ubuntu 18.4.2 - Qiita
https://qiita.com/xio_yae/items/f800a8ef250ef851279eNICTの脅威情報自動収集ツールEXISTをdockerで起動してみた - セキュリティ猫の備忘録
https://nekochansecurity555.hatenablog.com/entry/2019/04/01/234313
各種API
MalShare
https://malshare.com/VirusTotal
https://www.virustotal.com/VirusTotal /file/clusters
https://developers.virustotal.com/reference#file-clustersTwitter Developer
https://developer.twitter.com/Twitter APIをpythonで使うと〇〇ができる。 - どん底から這い上がるまでの記録
https://www.pytry3g.com/entry/python-twitter-apiTwitter Streaming APIの特定キーワード抽出 track が残念な件 | 情報工学とその周辺
http://eisukeito.com/blog/?p=121#twitterAPIを使用して、twitterからテキスト情報、時間、ユーザーidを取得する。 for Python - Qiita
https://qiita.com/e2katsuki/items/68e60bbbc3d71695d6c0Standard stream parameters — Twitter Developers
https://developer.twitter.com/en/docs/tweets/filter-realtime/guides/basic-stream-parametersPythonでTwitter API を利用していろいろ遊んでみる - Qiita
https://qiita.com/bakira/items/00743d10ec42993f85eb
MISP 関連
公式
- MISP/MISP: MISP (core software) - Open Source Threat Intelligence and Sharing Platform (formely known as Malware Information Sharing Platform)
https://github.com/MISP/MISP
構築周り
RHEL7/CentOS7 - MISP Install Documentation
https://misp.github.io/MISP/INSTALL.rhel7/MISP/xINSTALL.centos7.md at 2.4 · MISP/MISP
https://github.com/MISP/MISP/blob/2.4/docs/xINSTALL.centos7.md
MISP フィード設定
MISP Default Feeds
https://www.misp-project.org/feeds/Managing Feeds · User guide of MISP Malware Information Sharing Platform, a Threat Sharing Platform.
https://www.circl.lu/doc/misp/managing-feeds/
EXIST・MISP 共通
cron 設定周り
- cron の使い方(pythonスクリプト) - Qiita
https://qiita.com/saira/items/76a5538a6b2556f6b339
service 設定周り
Pythonコードをデーモン化する(Systemdとinit.dの違い) - DreamerDreamのブログ
http://dreamerdream.hateblo.jp/entry/2016/01/08/000000Systemd入門(4) - serviceタイプUnitの設定ファイル - めもめも
http://enakai00.hatenablog.com/entry/20130917/1379374797
DB 設定周り
MariaDBのテーブル定義を確認してみる - Qiita
https://qiita.com/Sa_Ru/items/a8e51f20becfb008f2e5MariaDBの日本語の文字化けを解消する - Qiita
https://qiita.com/aiiro/items/1c160f5cb70c0850e8ce(削除済み)MariaDB で日本語を扱う場合の文字コードの設定 | 雪猫ノート
http://blog.snowcait.info/2014/06/04/mariadb-utf8/CentOS 7 に MariaDB Community Server 最新版をインストール | MariaDB
https://mariadb.com/ja/resources/blog/install-mariadb-server-centos7/VagrantのDjangoで作るWebアプリケーション(その3 アプリケーション・モデルの作成) | Hornet|静岡拠点のWeb、ホームページ制作
https://hombre-nuevo.com/python/python0024/[MySQL]特定のテーブルを空にする « Codaholic
http://codaholic.org/?p=381MySQL のテーブルの文字コードを utf8 に変更する – UCWD-Studio – @matsuoka_UCWDjp 's Private Projects.
http://ucwd.jp/blog/814
その他
CentOS7 GUI システムの更新を無効化する PackageKit* | 優技録
https://www.yuulinux.tokyo/4048/PythonでJsonをよむときにエラーが出た場合の対処 - Qiita
https://qiita.com/callmekohei/items/929bd0749c1b8e4cad54logrotateしたときに`because parent directory has insecure permissions`というエラーが出る - Qiita
https://qiita.com/tjinjin/items/b2108b5178c096795a76
自動化スクリプト作成周り
vodkappa/misp-install-centos-7: script(s) info for automating installing MISP to CentOS 7
https://github.com/vodkappa/misp-install-centos-7ある文字列をファイルの特定行に挿入するコマンド - 元RX-7乗りの適当な日々
https://www.na3.jp/entry/20110310/p1変数を使用する | UNIX & Linux コマンド・シェルスクリプト リファレンス
https://shellscript.sunone.me/variable.htmlLinuxの対話がめんどくさい?そんな時こそ自動化だ!-expect編- - Qiita
https://qiita.com/ine1127/items/cd6bc91174635016db9b【 sed 】コマンド(基礎編その3)――行を追加する/挿入する:Linux基本コマンドTips(55) - @IT
https://www.atmarkit.co.jp/ait/articles/1610/13/news015.html#sample3[Linux]bashスクリプトで、複数行ファイルを非対話で作成する簡単な方法 - akamist blog
https://akamist.com/blog/archives/1005bash - shellscript内でsourceコマンドが使えない - スタック・オーバーフロー
https://ja.stackoverflow.com/questions/50568/shellscript%E5%86%85%E3%81%A7source%E3%82%B3%E3%83%9E%E3%83%B3%E3%83%89%E3%81%8C%E4%BD%BF%E3%81%88%E3%81%AA%E3%81%84【初心者向け】Linux PCのIPアドレスを確認する方法まとめ | LFI
https://linuxfan.info/ip-addressいい加減覚えよう。 `command > /dev/null 2>&1`の意味 - Qiita
https://qiita.com/ritukiii/items/b3d91e97b71ecd41d4eayumのダウンロードが遅い事象に対処する - Qiita
https://qiita.com/toshiro3/items/11a97ac67d65cf94ae91CentOS 7 yumのfastestmirrorが遅い - ソフトウェアエンジニアリング - Torutk
http://www.torutk.com/projects/swe/wiki/CentOS_7_yum%E3%81%AEfastestmirror%E3%81%8C%E9%81%85%E3%81%84今更聞けない!LinuxのOSやバージョンの確認方法
https://eng-entrance.com/linux-os-versionExecuting chdir before starting systemd service - Unix & Linux Stack Exchange
https://unix.stackexchange.com/questions/200654/executing-chdir-before-starting-systemd-service
付録:トラブルシューティング
yum コマンドが自動アップデートとバッティングしてしまう
GUI ありの場合は CentOS のインストール直後に yum コマンドが自動アップデートとバッティングしてしまう場合があります。 以下の通り、自動更新を無効化にしておくことで回避できます。
## サービスの停止、無効化
sudo systemctl stop packagekit
sudo systemctl mask packagekit

## サービスの削除(必要なら)
##sudo yum remove PackageKit* -y

## 再起動
sudo reboot
yum のインストールが遅い
ファイルのダウンロードが遅い場合は、以下のコマンドを入力し yum の取得先を比較的速度の早い国内サイトに限ることで改善される場合があります。
echo include_only=.jp >> /etc/yum/pluginconf.d/fastestmirror.conf
scripts/threat/insert2db.py 実行時のエラー
## python3 scripts/insert2db/threat/insert2db.py
Traceback (most recent call last):
  File "scripts/insert2db/threat/insert2db.py", line 307, in <module>
    json_dict = fetchMispJson()
  File "scripts/insert2db/threat/insert2db.py", line 63, in fetchMispJson
    if res.status_code == 200:
UnboundLocalError: local variable 'res' referenced before assignment
tail でログを確認します。
tail scripts/insert2db/threat/logs/insert2db.log
コンフィグ(scripts/insert2db/conf/insert2db.conf)の MISP の URL 設定(MISP_URL)の最後に "/" がついていなかったために接続に失敗していました。
取得ツイートの日本語が文字化けする
日本語が「????????????????????????????」などと表示されてしまう場合がありました。 DB の文字コード設定が latin1 になっていたことが直接の原因でした。 通常の EXIST 導入では発生しませんが、MISP を先にインストールしたことによる副作用で発生していました。
以下はそうなった場合の対処です。
まず DB の設定を変更(追記)します。
sudo vim /etc/my.cnf.d/server.cnf
[mysqld]
character-set-server=utf8
設定反映のために DB を再起動します。
sudo systemctl restart mariadb
これで次からは UTF-8 で DB が生成されますが、 一度作ってしまったDBについては個別に文字コードの変更が必要です。
MariaDB [intelligence_db]> alter database intelligence_db character set utf8;
さらにテーブルのカラムを UTF-8 に修正します。
MariaDB [intelligence_db]> alter table テーブル名 default charset=utf8;
参考サイト:
- MariaDBの日本語の文字化けを解消する - Qiita
https://qiita.com/aiiro/items/1c160f5cb70c0850e8ce(削除済み)
Running setup.py install for uWSGI ... error
以下をインストールするとうまくいくかも。
sudo yum groupinstall "Development Tools"
参考サイト:
- uwsgiをEC2インスタンスにインストールしようとして失敗した話 - Qiita
https://qiita.com/hayatetabata/items/111987d1b2b544f6185c
DB のセキュリティ設定(mysql_secure_installation) で「Switch to unix_socket authentication」と聞かれる
以下を参考に yes か no を決めて設定を進めます。
- MariaDB 10.4.1〜のユーザー認証がカオスな話(Unix_Socket) | GIZMELER
https://gizmeler.com/?p=466
EXIST のページスクリーンショットがうまく取得できない
EXIST の画面上は画像ファイルが壊れたときのアイコン表示となっており、 ログは以下のようになっていました。
[ERROR]    2019-10-17 00:00:00,000    module:views    /opt/exist/apps/url/views.py    message:No wkhtmltoimage executable found: "b''"
If this file exists please check that this process can read it. Otherwise please install wkhtmltopdf - http://wkhtmltopdf.org
wkhtmltopdf をインストールするなどすると解消されました。
yum install wkhtmltopdf xorg-x11-server-Xvfb -y
cp scripts/url/url.conf.template scripts/url/url.conf
sed -i -e "s/path\/to\/your\/exist/opt\/exist/g" scripts/url/url.conf
ImportError:configparserというモジュールはありません
MISP を導入済みの状態で EXIST を導入しようとした際に発生したエラーです。 直接の原因は大文字小文字「Configparser」と「configparser」で見つかる見つからないというもののようです。 Python2 環境と Python3 環境が絡み合っているのか、どうにも解消できませんでしたが、 Python の仮想環境で EXIST を導入&実行することで解消できました。
参考サイト:
venv: Python 仮想環境管理 - Qiita
https://qiita.com/fiftystorm36/items/b2fd47cf32c7694adc2e「ImportError:configparserというモジュールはありません」というPython 2.7.13のエラー・問題#70・luk6xff / Packt-Publishing-Free-Learning
https://github.com/luk6xff/Packt-Publishing-Free-Learning/issues/70Pythonモジュールのimportができなくなったときの対処記録 - Qiita
https://qiita.com/Kent_recuca/items/349586e9c034535f2991python - pythonのデフォルトバージョンを3.7にしたい - スタック・オーバーフロー
https://ja.stackoverflow.com/questions/53587/python%E3%81%AE%E3%83%87%E3%83%95%E3%82%A9%E3%83%AB%E3%83%88%E3%83%90%E3%83%BC%E3%82%B8%E3%83%A7%E3%83%B3%E3%82%923-7%E3%81%AB%E3%81%97%E3%81%9F%E3%81%84Python2.7からPython3.6をデフォルトにする話 - Qiita
https://qiita.com/sebeckawamura/items/4bc5945245877f250d2e(削除済み)
MISP のタイムゾーンがヨーロッパになっている(時刻表示がずれる)
MISP のインストールスクリプトでタイムゾーン設定がヨーロッパになっているため、 修正せずに利用すると時刻表示がずれてしまいます。
vim /etc/opt/rh/rh-php56/php-fpm.d/timezone.ini
date.timezone = "Asia/Tokyo"
変更を適用します。
systemctl restart rh-php72-php-fpm.service
EXIST にアクセスすると DisallowedHost と表示される
設定ファイル /opt/exist/intelligence/settings.py に EXIST が稼働しているサーバのIPアドレスが登録されていない場合に表示されます。
以下のようにIPアドレス(192.168.xxx.xxx の箇所)を設定すると解消されます。
ALLOWED_HOSTS = [
     'localhost',
     '192.168.xxx.xxx',   # <- Add the EXSIT Server IP adress
##    '192.168.56.101',
]
各種検索時に VirusTotal の情報が取得できていない
VirusTotal に関連するコンフィグファイルの読み込みに失敗している可能性があります。
- コンフィグファイル(
conf/exist.conf)の設定が正しいか - ログ(
logs/django.log)を確認してmessage:No section: 'vt'といったエラーが出力されていないか- エラーが出ている場合は下記の「message:No section: というエラーが出る」をご参照ください
message:No section: というエラーが出る
ログ(logs/django.log)に message:No section: 'vt' や message:No section: 'geoip' といったエラーが出る場合、
EXIST の実行スクリプト(manage.py)の作業ディレクトリが EXIST のインストール先と異なっている可能性があります。
EXIST が利用している lib/vt.py などにおいてコンフィグファイルへのパスが相対パスで記述されており、
作業ディレクトリが EXIST のインストール先であることを前提しているため、
それが異なっている場合はうまく動作しません。
カレントディレクトリを適切なものにしてから manage.py を実行するか、
サービスとして起動している場合は以下のように WorkingDirectory を指定すると解消されます。
vim /etc/systemd/system/exist.service
[Service]
WorkingDirectory=/opt/exist
変更を適用するためにはサービスの再起動が必要です。
systemctl daemon-reload
systemctl restart exist.service
付録
動画で見る構築手順
EXIST の構築手順を動画にしてみました。
- 準備編
- 構築編
更新履歴
- 2019/10/23 新規作成
- 2019/10/23 スクリプトの細かな不具合を修正。その他、一部表記を加筆修正。
- 2019/10/24 トラブルシューティングに「EXIST にアクセスすると DisallowedHost と表示される」を追加。
- 2019/10/24 自動化スクリプトについて追記・修正。
- 2019/10/24 EXIST サービス設定に誤り(WorkingDirectory を設定していないと VirusTotal などの情報取得に失敗する)があったのを修正。トラブルシューティングと参考文献に関連を追記。
- 2019/10/26 ログのローテートの設定と関連する参考文献を追加。
- 2019/11/12 ツイートへの直リンク生成部分を一部追加。
- 2019/12/02 EXIST のアップデートに合わせて記載内容を修正しました。表題や記載順序について整理しました。
- 2019/12/08 付録に構築手順の動画を追記。参考文献と付録の記載順を修正。
- 2020/08/31 一部の削除されていたページについて記載に反映。
- 2023/01/10 一部リンク切れの旨を追記
*1:厳密に確認はしていませんが、記述内容からすると MISP の公式 github に掲載されているインストール手順をうまく自動化できるように組み上げたもののようです。